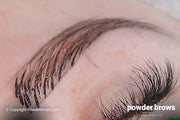
***What you need///For the first pass in microblading, you'll need the following:
Pigment: Choose a suitable color for your client.
Tool with Blade: Essential for creating the brow strokes.
Microbrush: Used to apply anesthetic to the eyebrow area.
Cotton Pads: For wiping away excess pigment. If needed, use with pure water (ensure it's free from perfumes or oils) to clean the area.
***First lines///In this phase we accomplish the following.
Identifying the Brow's Backbone Begin by locating the natural backbone of the brow. This is essential as your guide for the entire process.
Observing Hair Growth Pay close attention to the direction of the natural hair growth. Your microblading strokes should follow this pattern to ensure a natural appearance.
Applying Pigment Dip only the tip of the blade into the pigment. This practice helps maintain clean, precise lines.
Skin Stretching Properly stretch the skin where you're working. This makes the skin surface tight and easier to work on.
Listening for the Blade A correct angle (90 degrees) and appropriate depth will produce a distinct scratching sound. This auditory cue indicates you're applying the blade correctly.
Adjusting the Angle For each stroke towards the backbone, slightly adjust the angle of your blade. This technique creates a more natural "flow" of the lines, mimicking the natural hair pattern.
Gentle Strokes Employ a light-handed approach throughout. The term "Light microblading" emphasizes the importance of gentle, precise strokes to avoid overly harsh or deep lines. By following these steps, you'll ensure a successful first pass, laying down the foundation for a natural-looking brow enhancement.
***Lower lines///In this phase please keep in mind the following:
Minimal Pigment Ensure minimal pigment on the blade to maintain precision and cleanliness in each stroke.
Use Three-Line Strategy This technique involves drawing three key lines. The lines must be symmetrical, creating a harmonious and balanced appearance for both brows.
Line Placement The lower lines should sequentially "fall" or angle downwards in relation to the one above, enhancing the natural contour of the brow.
Pressure Application Correct pressure may result in minimal bleeding. This is normal and indicates you've reached the appropriate depth with the blade.
Adapting to the Backbone Depending on thel backbone of the brow, extend the lines towards the end of the brow. This ensures the microblading follows the natural shape and direction of the eyebrow.
***Upper main lines///Creating upper main lines, the following has to be taken into account.
Starting Point The upper main lines commence where the initial lines conclude, extending towards and even crossing over the brow's backbone for a natural continuation of the brow shape.
Line Placement These lines should start as close as possible to the beginning lines without actually connecting them. This approach ensures a natural-looking start to each hair stroke, enhancing the overall appearance of the brow.
Applying Pigment After drawing the lines, gently rub the pigment into the incisions. This step ensures that the pigment is adequately absorbed into the skin, solidifying the color and shape of each stroke.
Anaesthetic Application Directly after applying the pigment, apply the anaesthetic on top. This dual application allows the anaesthetic to penetrate the skin more effectively while also sealing the pigment within the brow. The result is not only a more comfortable experience for the client but also enhanced retention of the pigment.
***The second brow - lower lines///When it comes to the second brow, keep in mind the following.
Symmetry with Variation Aim for symmetry with the first brow in terms of line style and placement. However, the starting points of the brows should not be identical replicas. Each brow is unique, and slight variations ensure a more natural look.
Natural Hair Growth As with the first brow, closely observe and mimic the natural hair growth direction. This approach is key to achieving a realistic appearance.
Gentle Technique Apply the lines gently to minimize discomfort. The client's experience should be as pain-free as possible, with any pain being well within tolerable limits.
Line Orientation Remember, each subsequent lower line should progressively become more horizontal than the one before it. This gradual change mirrors natural eyebrow contours and enhances the brow's overall shape.
***The second brow - upper lines///When doing the upper lines to the second brow, please keep in mind the following.
Starting Point Begin where the initial lines end, extending the lines toward and potentially over the brow's backbone. This continuity is key for a cohesive and natural brow appearance.
Line Placement Initiate these strokes as close as possible to the starting lines without merging them, maintaining a natural transition at the beginning of each hair stroke.
Applying Pigment Once the lines are drawn, gently work the pigment into the skin. This careful application ensures deep, lasting color and defines the shape of each stroke.
Anaesthetic Application Immediately after the pigment, apply an anaesthetic to the area. This combination not only soothes the skin but also helps lock in the pigment, enhancing both the comfort and the outcome for the client.
To conclude the first pass, reiterate the process of rubbing in both the pigment and the anaesthetic. This final step solidifies the pigment in the skin and ensures the anaesthetic's effectiveness, laying a strong foundation for a beautifully shaped and comfortable brow experience.
At Goldvic by Victoria Vega, we take pride in providing high-quality, custom-made, and factory-produced jewelry, specializing in Cuban link chains and Franco-style chains.
Delivery Times
Shipping times vary based on the specific item ordered. The estimated delivery time depends on whether the piece is in stock or custom-made.
- In-stock items: Orders for pieces available in our inventory typically ship within 4-5 days, depending on the buyer's location.
- Custom designs: For custom-designed items, the standard delivery time is approximately 3 weeks, as each piece is crafted to meet your unique specifications.
Shipping Locations
To expedite delivery, we ship from one of our three primary warehouses, depending on the buyer’s location:
- US, CAN: Atlanta
- UK: London
- EU, INTERNATIONAL: Barcelona
We strive to ensure timely and secure delivery for all our customers, keeping you updated throughout the process.
At Goldvic by Victoria Vega, we aim to provide swift and secure delivery to our customers worldwide.
Shipping Times
We process and ship orders Monday through Friday during regular business hours.
- For USA, Canada, UK, EU, and Australia orders:
Enjoy FREE FedEx/DHL shipping, with an estimated delivery time of 4-7 business days. - For international orders:
We also offer FREE FedEx/DHL shipping, typically arriving within 4-7 business days.
To track your shipment in real-time, visit our Order Tracking page.
Processing Time
Processing times vary by item. Some in-stock pieces may ship within 48 hours, while custom orders can take 3-4 weeks for completion. You will receive an email notification with tracking details once your order has shipped.
Important: Occasionally, payment processing may take up to 48 hours, which could affect the overall shipping timeline. Orders will be shipped once payment has been successfully confirmed.
Customs and Duties
The price of your purchase does not include any customs duties or import taxes.
As a customer, you are responsible for any additional taxes or fees required by your country’s customs office. These fees, if applicable, are typically paid directly to your local authorities upon delivery. We recommend checking with your local customs office for more details.
At Goldvic by Victoria Vega, we prioritize your satisfaction. However, due to the nature of our products, returns are handled on a case-by-case basis.
Return Eligibility
Returns are accepted for factory-produced items, provided they are unworn, undamaged, and in their original packaging. Custom-designed pieces, personalized items, or made-to-order products are non-returnable, as they are tailored to your unique specifications.
Return Process
To initiate a return, please contact our customer service team within 14 days of receiving your item. Returns must be shipped back to us within 7 days of approval. Return shipping costs and any related customs fees are the responsibility of the customer.
Non-Returnable Items
- Custom orders
- Personalized jewelry
- Any items that have been worn or damaged after delivery
If you have any questions about the return process, feel free to contact us for assistance.
RECENTLY VIEWED PRODUCTS


